Desktop Site Analysis for Interior Design; What is it and why bother?
Unveiling a nerdy part of the design process that brings intention, dimension and connection to any interior design work in and around our homes.
INTERIOR DESIGN PRINCIPLES
S.Threlfall
7/16/20257 min read


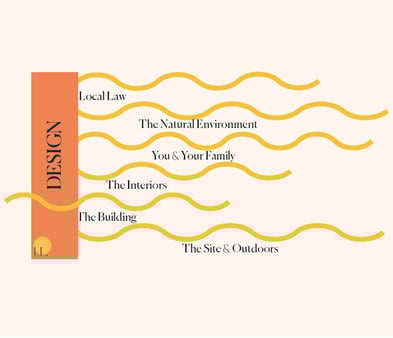
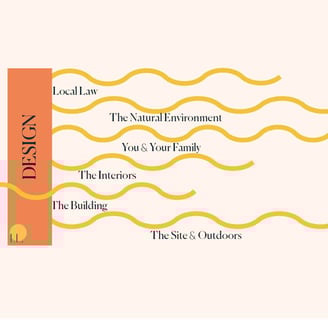
The Layers of a Desktop Site Analysis
I loved learning how to do a desktop site analysis last year. Once you understand the nature of the information gathered when you doing this type of preliminary research I think you will see its undoubtable value.
The way certain buildings and their interiors are perfectly connected to their wider environment and site is fascinating, and of course I needed to crack the code. I quickly realised the Desktop Site analysis is essential to gain a throughout understanding of your site, climate and general context way before dreaming of finishes and layouts!
The layers, all parts of the project can be uncovered, understood and connected in this beautiful work that is Design.
When you understand your site you can create a seamless flow between buildings, interiors, its people and their lifestyle within their wider environment.
Last blog, I shared with you the narrative part of the brief for Fall Design Lab.
I wrote it following the prompts I also shared with you there, I hope it gave you a good example of a simple way to look at your needs in a more holistic way.
Material and Immaterial. I think by now you've realised I advocate for architecture & interior design that supports psychological and physiological human function.
I am excited about sharing today's blog! It is dense, I have tried to make it as palatable as possible. If you have any questions pop them in the form and Ill take some time to respond at each and every of them. Alright, ready?
1. Site Basics, Human-made Context
The first thing I look at is the location. The real estate listing, the aerial photographs, map, and the site map with boundaries are all very helpful. I also use Google Maps and Street View to find all that information and to get a sense of the surroundings.
Then I look at access and egress, and the neighbourhood as a whole.
How do you get there? Any private roads, steep or narrow areas, or places where access could be difficult? Are there known traffic issues or congestion around the site?
The nature & style of the building is so important. When was it built? What is its square meterage? How many rooms are there, and what is the general layout? What is the orientation? What era should I start to research into?
You also need to know about connected services like water, sewer, power, and internet. If you’re unsure about the connected services, there are a good Australian website you can use to check any pipes work or public connection near your site: Before you Dig . A quick inernet research into your local services suppliers can also help.


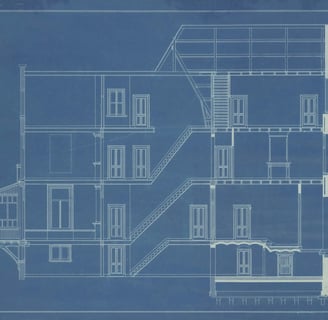
2. Past Permits and Local Law
To find out about past, approved or revoked permits, what I simply sent an email to the local council. Sometimes there’s a form to fill online, and other times you might have to pay a fee. For our site I paid $40.
From that, you can get plumbing permits and past permits that have been approved—or even those that were rejected. This is a great source of information because it helps you understand your constraints, but also your opportunities.
In Tasmania, for zoning and overlays, you can find all the local laws that apply to your plot on the council website. This is pretty standard around Australia. If you have trouble finding this, send an email or even just call the council and ask where to locate the information.
You don’t always have to give your name if you prefer to remain anonymous.

3. Environmental Conditions, Natural Context
There is a vast array of resources available for this step depending on the complexity of your site. It can get daunting when you are just trying to get simple and straightforward information.
I like the Bureau of Meteorology (BOM)& Meteoblue.com for climate data.
In Tassie, we have the LIST for topography and geology maps.
If you have hired a building designer, architect or interior designer they will likely do that work for you. If you are an owner builder and some of the the information you find makes you to think your site/block is complicated, get in touch with a surveyor this will avoid you a heartache.
I always start with the sun. The orientation of the building, of its living quarters will make or break your liveability, comfort and happiness (yes its proven and we will talk more about that soon.)
I use an app on my phone called SunOnTrack, which cost me $10 as a one-off subscription.
It’s very handy because it has a 3D function where you can hold your phone up, and through the camera, see how the sun moves across your environment. Instantly, you can tell if the sun will be blocked by a tree, a fence, or an adjoining building.
You can also move through the months to see where the sun will be at other times of the year. This is such a great way to figure out where you’ll have natural light and where you’ll have shade.
Tip: Great app to use when you are looking at buying a house, use this during the inspection to check sunlight in living areas at both solstices, 21 June & 21 Dec.


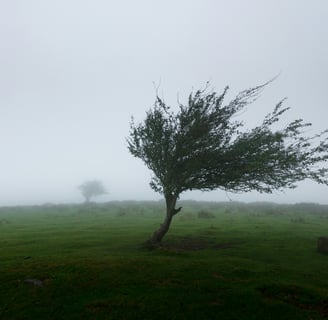
For prevailing winds, I used Meteoblue, the History + data base.
I paid €100 (about $170 AUD) for access to historical data going back to 1985 for the block we purchased. (Think of it as an investment, I will use this data for our mid century home renovation as well, Larapinta, coming next year.)
I could then download data for both winter and summer winds trends over the last 40 years. Knowing the prevailing direction of the wind is important to protect your indoors and outdoors but also for designing cross-ventilation.
I really value cross-ventilation in summer, I want a building with very low energy reliance. I don’t like air conditioning, I find the cold air and unclean filters upsetting for my asthma so knowing how to bring in fresh air naturally is a priority for me.


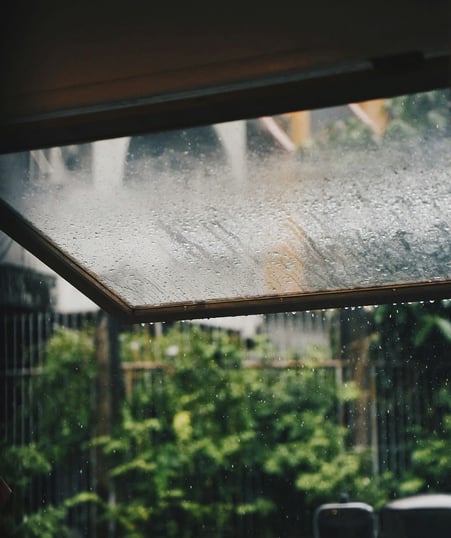
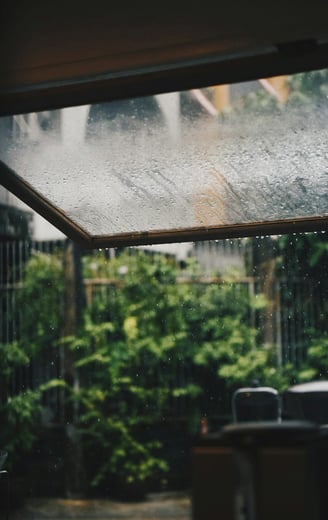
For rain and precipitation, I found great information on BOM.
It provided me with a 10-year average rainfall in mm, as well as maximum, minimum, and median rainfall.
This is essential when you’re on water tanks, like we are. It helps you calculate how many tanks you’ll need, depending on your roof area and your household consumption, number of people. It will also inform your outdoor design needs and connection to the indoors.
How can the home’s design protect interiors from moisture while still connecting you to the outdoors? Are the eaves deep enough to let you keep windows open during summer rain? Is there adequate drainage to prevent water pooling near thresholds and bringing dampness inside?
These decisions affect air quality, light, and your ability to enjoy indoor–outdoor living. Intentional interior design anticipates these site realities, creating spaces that feel sheltered, dry, and comfortable—even in a downpour.
Plus garden! Some plants will be more resilient, while others won’t cope as well. Understanding how to work with your circumstances is fabulous and avoids you pushing fluff uphill.
For temperature averages, Meteoblue gave me graphs showing the extremes and averages for each season.
It’s good to understand the maximum and minimum temperatures of your site to plan for comfort. Temperature is more so related to the micro climate of your site. Do not overlook this thinking it will be identical to your previous local location.


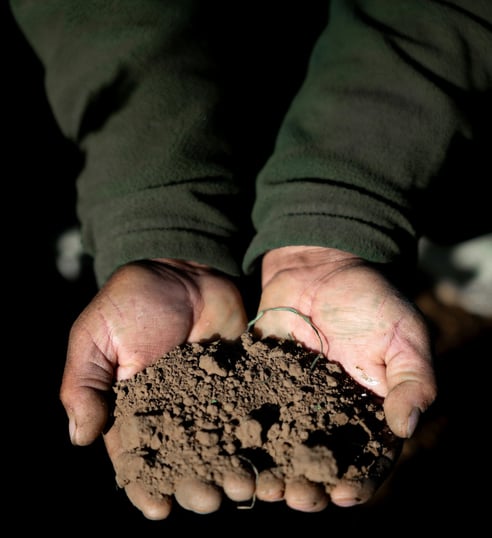
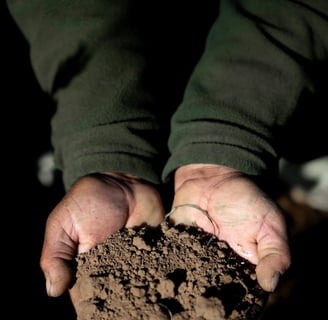
For soil and elevation, I went toThe LIST, which is an excellent Tasmanian resource by the Department of Natural Resources and Environment.
It gives geology and topography information about your location. This helps you understand slopes and drainage, views, suitability for septic systems, and structural considerations for footings.
It also informs landscaping decisions and what might be possible or impossible on your site.


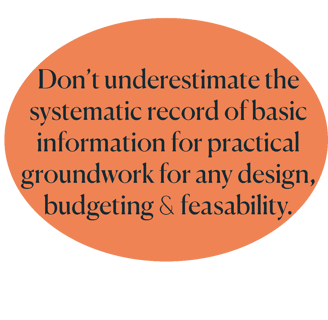
After you have collected all this data, you need to compile it into a digestible infographic that can guide you during your design process.
Architects and designers generally transform this data into a Site Analysis Map coupled with diagrams and infographics, so it’s easy to read, share, and include in the rest of the project documentation. This becomes a vital reference point while making all the design decisions we’ve discussed above.
I’m certain you now have a better understanding of how important a thorough desktop site analysis is to the design process—and how the absence of this information can lead to poor decisions.
Stay with me as we use Fall Design Lab as a case study later this week. Follow the videos on my channels to explore how to apply these tools and approaches to your own projects.
Elevate your connection to the land, your site, and create spaces where your family and yourself can thrive within the built environment.
Further reading for those who want to go deeper into each categories:
https://archimash.com/articles/architectural-site-analysis-guide/
https://www.firstinarchitecture.co.uk/architecture-site-analysis-guide-2/
Any questions?
Get in touch
Always only an email away!
Email me at sarah@falldesign.com.au
Copyright 2025 Fall Design Studio.
All Rights Reserved. Designed by S. Threlfall,
Fall Design
| Privacy Policy | Terms of Use |
I acknowledge the Traditional Custodians of the land on which I live and work, the Palawa people of Lutruwita (Tasmania). I pay my respects to their Elders past, present, and emerging, and recognize their ongoing connection to this land,
its waters, and skies. Their deep knowledge, culture, and care for Country continue to inspire and guide us.
Always was, always will be, Aboriginal land.